In today’s fast-evolving dental industry, mastering the tools of your trade goes beyond the dental chair – it extends into the realm of practice management.
Enter Denticon, a revolutionary cloud-based software transforming how dental professionals handle their day-to-day operations.
This comprehensive “Denticon User Manual” by Logintrick.com is your gateway to unlocking the full potential of Denticon, a platform designed to streamline your practice, from patient records to billing.
Whether you’re navigating the complexities of appointment scheduling or delving into the depths of financial reporting, our guide promises to illuminate the path to mastery.
With Denticon, you’re not just managing a dental practice; you’re elevating it to new heights of efficiency and patient satisfaction.
Let Denticon user manual be the key to unleashing Denticon’s power and setting a new standard in dental practice management.
What is Denticon?
Denticon by Planet DDS is a trailblazer in the dental industry, representing a significant advancement with its cloud-based dental practice management software, similar to DaVita Intranet; it is an internal online platform used by DaVita Inc. but for kidney care services.
This innovative platform has revolutionized how dental practices operate, offering a comprehensive and integrated solution that caters to the unique needs of the modern dental professional.
The significance of Denticon lies in its ability to streamline operations, enhance patient care, and improve overall practice efficiency through its array of features.
Key features of Denticon include patient management, appointment scheduling, electronic health records (EHR), billing, and insurance processing, all designed to work seamlessly together.
This integration simplifies many of the complex and time-consuming tasks associated with running a dental practice, from managing patient data to financial reporting.
The cloud-based nature of Denticon allows for easy access to this information from anywhere, providing flexibility and real-time data management, which is particularly beneficial for multi-location practices or for those needing remote access to their practice’s data.
Moreover, Denticon places a strong emphasis on security and compliance, ensuring that patient data is handled securely and following the latest HIPAA regulations, instilling confidence among its users.
This article aims to provide a detailed Denticon user manual guide. This guide is crafted to help dental professionals fully leverage the capabilities of Denticon to enhance their practice’s efficiency and productivity.
Denticon user manual serves as a comprehensive resource for both new and experienced Denticon users, helping them to optimize their usage.
It offers insights into the software’s features, practical tips for effective use, troubleshooting advice, and strategies for maximizing the benefits of this powerful dental practice management tool.
Getting Started With Denticon User Manual
Steps for Initial Setup and Registration
- Create an Account: Visit the official Denticon website. Choose the ‘Sign Up’ or ‘Get Started’ option, typically found on the home page. Fill in the required details, such as practice name, contact information, and other necessary details, to create your practice’s account.
- Verification Process: After submitting the registration form, you may need to undergo a verification process. This could involve email verification or a direct call from a Denticon representative. Complete the verification to activate your account.
- Initial Configuration: Once your account is verified and active, log in to your Denticon account. Set up the basic practice information, including practice name, address, and contact details. Add the details of the practitioners and staff members as required.
- Training and Resources: Denticon often offers training sessions or resources for new users. Take advantage of these to familiarize yourself with the software. Explore the available resources such as video tutorials, webinars, or user guides provided by Denticon.
Overview of System Requirements and Compatibility
- Internet Connection: As a cloud-based software, a stable internet connection is crucial for Denticon to function effectively.
- Compatible Browsers: Denticon is designed to work with most modern web browsers such as Google Chrome, Mozilla Firefox, Safari, and Microsoft Edge. It is advisable to use the latest version of these browsers for optimal performance.
- Hardware Requirements: Since Denticon is cloud-based, heavy hardware requirements are minimal. A computer with a reliable internet connection and the ability to run one of the compatible web browsers is generally sufficient.
- Mobile Compatibility: Denticon may also be accessible via mobile devices, although the experience is optimized for desktop use. Check if there is a mobile app or a mobile-friendly website version for on-the-go access.
How to Log in and Navigate the Basic Interface?
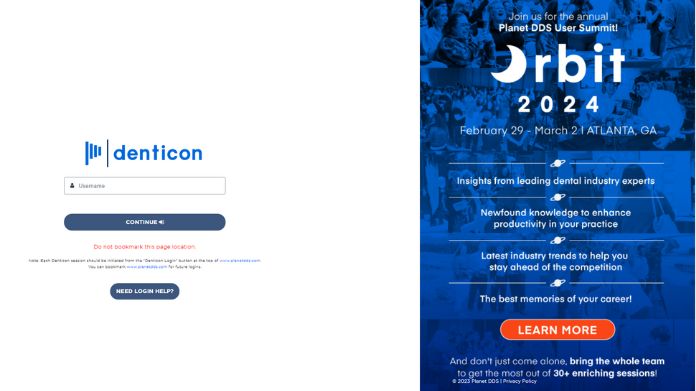
- Logging In: Go to the Denticon website. Click on the ‘Login’ button. Enter your username and password provided during the registration process.
- Dashboard Navigation: Upon logging in, you will be directed to the dashboard. This is the central hub where you can access various features. Familiarize yourself with the layout – typically, there are menus for patient management, appointments, billing, and reports.
- Exploring Features: Use the main menu to explore different sections like patient records, appointment scheduling, and more. Look for a ‘Help’ or ‘Support’ option within the interface for assistance on specific features.
- Customization: Check if there are customization options for the dashboard to tailor it to your practice’s needs.
- Logging Out: For security purposes, always log out of the system after use, especially when using shared or public computers.
Remember, the initial phase of using any new software involves a learning curve. Take your time to explore Denticon’s features and consult the provided resources to become comfortable with its interface and functionalities.
Dashboard and User Interface
Detailed Breakdown of the Denticon Dashboard
The Denticon dashboard serves as the central command center for dental practice management and is designed to be user-friendly and intuitive.
Here’s a breakdown of its key components:
- Main Navigation Bar: Located typically at the top or side of the screen. Provides quick access to major modules like Patient Management, Appointments, Billing, Reports, and more.
- Appointment Calendar: Displays daily, weekly, or monthly appointment schedules. Color-coded entries for easy recognition of different appointment types or statuses.
- Patient Alerts and Reminders: This section provides notifications about patient appointments, follow-ups, and treatment reminders. It helps manage patient communications efficiently.
- Task List or To-Do Panel: Shows pending tasks or actions required, such as pending insurance claims or uncompleted patient records. It can be personalized for each user.
- Financial Summary: Provides a quick overview of the practice’s financial status, including outstanding invoices, daily collections, and insurance claims.
- Performance Metrics: Displays key performance indicators (KPIs) like patient retention rates, treatment acceptance rates, and other customizable metrics.
- Quick Links or Shortcuts: Allows users to create shortcuts to frequently used features or modules.
- Messaging and Notifications: The in-built messaging system is for internal communication. The notification center provides alerts on software updates or important information.
Explanation of Key Features and Their Accessibility
- Patient Management: Comprehensive patient profiles with medical history, treatment plans, and personal details. Easily accessible from the main dashboard.
- Appointment Scheduling: Interactive calendar for booking, rescheduling, and canceling appointments. Drag-and-drop functionality and real-time updates.
- Billing and Insurance Processing: Automated billing processes for treatments and procedures. Features for submitting and tracking insurance claims.
- Reporting and Analytics: Customizable reports for financial analysis, patient demographics, and more. Ability to export data for further analysis.
- Clinical Charting: Digital charting tools for recording patient treatments and procedures. Integration with imaging and diagnostic tools.
Customization Options for Individual Users
- Dashboard Customization: Users can often personalize their dashboard layout to prioritize information that is most relevant to their role. Option to add or remove widgets and shortcuts.
- User-Specific Access: Role-based access control allows different levels of access and functionalities depending on the user’s role in the practice (e.g., dentist, hygienist, administrative staff).
- Preference Settings: Users can set their preferences for notifications, messaging, and display options. Options to configure appointment reminders and patient communication templates.
- Theme and Display: Some versions of Denticon may allow changing themes or color schemes for a more personalized experience.
- Reporting Customization: Ability to create custom reports based on specific requirements or KPIs.
By offering these comprehensive and customizable features, the Denticon dashboard ensures that each user can efficiently manage their specific responsibilities within the dental practice, enhancing overall productivity and patient care.
Patient Management Features
How to Add New Patients and Manage Patient Records in Denticon?
- Adding New Patients:
- Access the ‘Patient Management’ module from the main navigation bar.
- Select the option to ‘Add New Patient’ or similar.
- Fill in the required fields, such as patient name, contact information, date of birth, insurance details, and medical history.
- Save the information to create a new patient record.
- Managing Patient Records:
- Locate the patient through the search feature in the ‘Patient Management’ section.
- Access the patient’s profile to view and edit details.
- Update personal information, medical history, treatment notes, and other relevant data as needed.
- Utilize features like document uploading or image integration for comprehensive record-keeping.
- Ensure all changes are saved properly.
- Record Confidentiality and Security:
- Adhere to HIPAA guidelines for patient data privacy.
- Restrict access to sensitive information within Denticon based on user roles and permissions.
Scheduling Appointments and Managing Calendars
- Scheduling Appointments:
- Open the ‘Appointment Scheduling’ or ‘Calendar’ module.
- Choose the desired date and time slot on the calendar.
- Enter patient information and select the type of appointment or service.
- Confirm the appointment details and save. The system may automatically send a confirmation to the patient.
- Viewing and Modifying Appointments:
- Navigate the calendar to view upcoming appointments.
- Click on an appointment to edit or reschedule.
- Utilize drag-and-drop functionality for quick rescheduling.
- Cancel appointments if necessary, with options to notify the patient.
- Calendar Customization:
- Customize the view (day, week, month) based on preference.
- Filter appointments by practitioner, type, or status for easier management.
Features for Patient Communication and Reminders
- Automated Appointment Reminders: Set up automated reminders via email, SMS, or calls. Customize the timing (e.g., a day or a week before the appointment) and frequency of reminders. Personalize message templates for different appointment types.
- Patient Communication Tools: Utilize in-built messaging systems for direct communication with patients. Send individual or bulk messages for announcements, reminders, or follow-ups.
- Patient Portal: Offer patients access to a secure portal where they can view their appointments and treatment history and communicate with the practice. Enable patients to request appointments or update their information online.
- Feedback and Surveys: Send post-appointment surveys to gather feedback. Use patient feedback to improve service quality and patient experience.
These features in Denticon streamline the process of adding and managing patient records, scheduling appointments, and enhancing patient communication. By leveraging these tools, dental practices can improve operational efficiency, reduce no-shows, and foster better patient relationships.
Billing And Financial Management
Guide on Managing Billing, Invoices, and Insurance Claims in Denticon
- Creating and Managing Invoices:
- Access the billing section from Denticon’s main dashboard.
- Create a new invoice when a patient receives treatment. Input all relevant services, procedures, and any products used.
- Apply any discounts or special rates as applicable.
- Finalize and issue the invoice to the patient, either in print or digitally.
- Handling Insurance Claims:
- Enter insurance information in the patient’s profile for reference.
- Generate insurance claims directly from the treatment record.
- Use Denticon’s tools to submit claims electronically to insurance providers.
- Track the status of claims through the software, noting any approvals, rejections, or requests for additional information.
- Processing Payments:
- Record payments received against the respective invoices.
- Manage various payment modes such as cash, credit/debit cards, or insurance payments.
- Provide receipts for payments received.
Overview of Financial Reporting Tools
- Revenue Reports: Generate detailed reports on daily, weekly, or monthly revenue. Analyze revenue streams from different services or practitioners.
- Expense Tracking: Monitor practice expenses and overheads. Categorize expenses for a clearer financial picture.
- Insurance Reports: Produce reports on insurance claim statuses, including payments received and outstanding claims.
- Account Receivables Reports: These reports Track outstanding invoices and aged receivables. They also identify patterns in late payments and devise strategies to improve collections.
- Custom Reports: Customize reports to fit specific needs or to focus on particular aspects of the practice’s finances.
Tips for Efficient Financial Tracking and Management
- Regular Review: Schedule regular reviews of financial reports to stay on top of the practice’s financial health. Use insights from reports to make informed decisions.
- Accurate Data Entry: Ensure all financial transactions are recorded accurately and promptly. Inaccuracies can lead to misinformed decisions and financial discrepancies.
- Utilize Automated Features: Take advantage of Denticon’s automated features for billing and claims processing to reduce manual errors and save time.
- Stay Informed on Insurance Policies: Keep abreast of changes in insurance policies and procedures to ensure compliance and efficient processing.
- Patient Communication: Maintain clear communication with patients regarding their financial obligations, billing procedures, and any insurance-related matters.
- Training and Support: Ensure all staff members are adequately trained in using Denticon’s financial tools. Utilize support and training resources offered by Denticon to enhance efficiency.
By effectively utilizing Denticon’s billing, invoicing, and financial reporting tools, dental practices can streamline their financial processes, ensuring accurate tracking and management of financial health.
Regular use and review of these tools can lead to more strategic decision-making and a more robust financial foundation for the practice.
Clinical Tools and Charting
Detailed Guide on Using Clinical Tools for Patient Treatment in Denticon
- Accessing Clinical Tools: Navigate to the clinical or treatment section within Denticon. Familiarize yourself with the layout and various tools available, such as treatment planning, progress notes, and prescription management.
- Treatment Planning: Create individualized treatment plans for each patient. Select from a pre-set list of procedures or add custom treatments. Use the platform to estimate treatment costs and duration.
- Progress Notes and Documentation: Document each visit with detailed progress notes. Utilize templates or create custom note formats for consistency and efficiency. Attach images or documents as needed for comprehensive records.
- Prescription Management: Use the e-prescription feature to prescribe medications. Ensure all prescriptions are accurately recorded in the patient’s profile.
- Using Clinical Decision Support Tools: Leverage built-in tools to assist with clinical decisions based on patient data and treatment history.
How to Use Denticon’s Charting Features Effectively?
- Understanding the Charting Interface: Familiarize yourself with the dental chart layout and icons representing various dental conditions and treatments.
- Entering and Updating Dental Records: Use the charting feature to record and update dental examinations, findings, and treatments. Accurately chart conditions like cavities, restorations, extractions, and others using the appropriate symbols and codes.
- Visual Tools: Take advantage of visual tools like tooth charts and periodontal charts for more interactive and detailed record-keeping.
- Consistency and Accuracy: Maintain consistency in charting methods among all staff to ensure the accuracy and reliability of records. Regularly update the dental charts after each appointment or treatment.
- Historical Data Review: Use the charting history to review past treatments and conditions for better patient care continuity.
Integration With Other Clinical Software and Tools
- Compatibility Check: Ensure that the external software or tools are compatible with Denticon. This information can usually be found on Denticon’s website or through customer support.
- Seamless Data Sharing: Utilize integrations that allow seamless sharing of patient data, imaging, and records between Denticon and other software, such as radiography tools or imaging software.
- Synchronization: Set up synchronization features to ensure that data is consistently updated across all platforms.
- Utilizing API Integrations: If Denticon offers API (Application Programming Interface) access, use it to integrate with other software solutions. This might require technical assistance.
- Maximizing Efficiency: Use integrations to minimize redundant data entry and enhance workflow efficiency.
- Staying Informed on Updates: Regularly check for updates or new integration options provided by Denticon to improve clinical efficiency continuously.
By effectively leveraging Denticon’s clinical tools, charting features, and integration capabilities, dental practices can enhance the quality of patient care, streamline clinical processes, and ensure a high level of accuracy and efficiency in patient treatment and record management.
Final Words
This comprehensive Denticon user manual has walked you through the essential aspects of utilizing Denticon to its fullest potential. We’ve explored the initial steps of setup and registration, delved into the nuances of the intuitive Denticon dashboard, and highlighted the ease of adding and managing patient records.
The guide also covered the intricacies of scheduling appointments, the convenience of Denticon’s billing and financial reporting tools, and the seamless integration of clinical tools for enhanced patient treatment. Notably, Denticon’s effective charting features stand as a testament to its commitment to precision and efficiency in dental practice management.
As you continue using Denticon, I encourage you to explore the Denticon user manual’s many features. Each module, from patient management to financial tracking, is designed to transform the way your dental practice operates, bringing about a level of efficiency and patient care that sets new industry standards. The versatility and comprehensiveness of Denticon make it more than just software; it’s a partner in your practice’s growth and success.